
Home · Help · Installing Windows Server
Installing Windows Server 2025 on a KVM vServer
Windows Server runs on every vServer KVM. The installation starts in the customer portal directly from the vendor's ISO image, with drivers and firewall rules prepared. From the start to the first Remote Desktop login it takes about 40 minutes.
What you need
- A vServer KVM. Every KVM plan meets the minimum requirements of Windows Server 2025 with Desktop Experience. Windows does not run on a container vServer.
- For continuous use, your own Windows Server license. Without a license the vendor's evaluation runs for 180 days.
- A Remote Desktop client: on Windows „Remote Desktop Connection“ (
mstsc), on the Mac the Windows App by Microsoft, on Linux Remmina.
Step 1: Start the installation
- Open the vServer in the customer portal under „Server“.
- Open „Konsole öffnen“ (open console) first. You will need the console for one key press.
- On the „Neuinstallation & SSH“ (reinstall and SSH) card, choose „Windows Server 2025 … – Installation vom Hersteller-ISO“ (installation from the vendor ISO) as the operating system, in German or English.
- Choose „Server neu installieren“ (reinstall server). Before the start the customer portal asks for the settings, see below. All data on the server will be deleted.
Settings before the installation
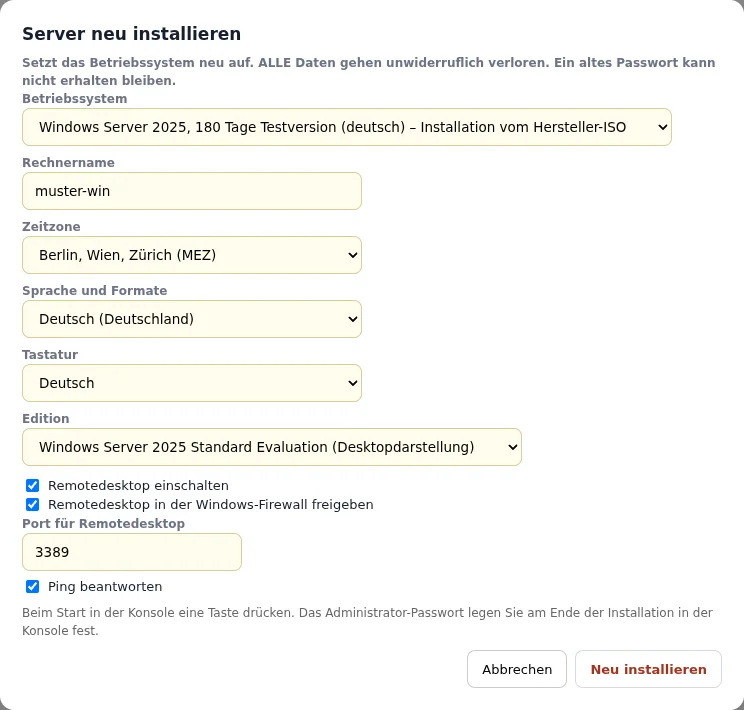
| Field in the customer portal | Options |
|---|---|
| Edition | Standard or Datacenter, each with or without Desktop Experience, read from the ISO image |
| Computer name | at most 15 characters |
| Time zone, language and formats, keyboard | free choice |
| „Remotedesktop einschalten“ (turn on Remote Desktop) | yes or no |
| „Remotedesktop in der Windows-Firewall freigeben“ (allow Remote Desktop in the Windows firewall) | yes or no |
| „Port für Remotedesktop“ (Remote Desktop port) | default 3389 or a custom port |
| „Ping beantworten“ (answer ping) | yes or no |
The server is set up from scratch. Installation image and VirtIO drivers are attached as USB drives, and our installation script takes care of the setup. The status shows „Windows wird installiert“ (Windows is being installed).
Step 2: Boot in the console
After the start the console shows „Press any key to boot from CD or DVD“. The prompt only stays for a few seconds. One key press in the console starts the setup, as on any PC. If the prompt was missed, „Neu starten“ (restart) in the customer portal brings it back.
Step 3: Setup runs on its own
From here no input is needed. Our installation script applies the chosen settings, plus:
- Drivers for disk (vioscsi, viostor), network (NetKVM), memory (Balloon) and serial port (vioserial)
- Partitioning of the whole disk with UEFI
Windows gets the server's IP address automatically via DHCP. The server restarts several times during installation.
Step 4: Set the administrator password
Finally Windows asks in the console for the password of the Administrator account. We do not assign or know this password. Windows requires a complex password with characters from at least three of the groups uppercase letters, lowercase letters, digits and special characters. If Remote Desktop is reachable from the internet, a long random password is recommended.
At the end of the installation all media are ejected automatically and the status is back to „läuft“ (running).
Step 5: Connect via Remote Desktop
- Enter the server's IP address in the Remote Desktop client, with a colon and the port if you chose a custom port, for example
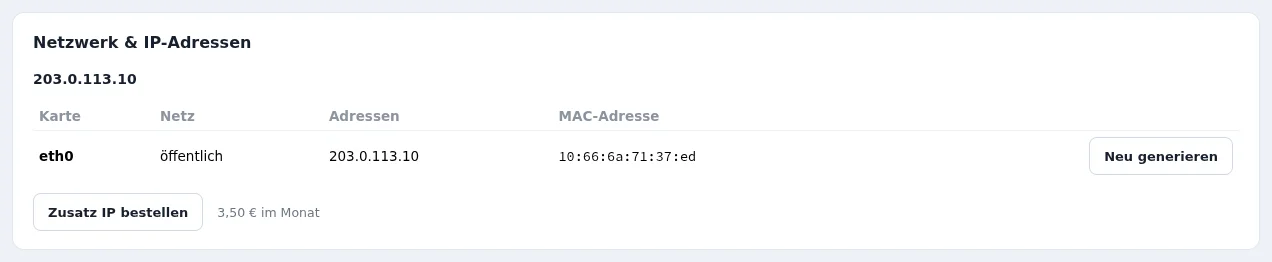
203.0.113.10:3390. The address is shown in the customer portal on the „Netzwerk & IP-Adressen“ (network and IP addresses) card. - Use
Administratoras the user and the password you just set. - The certificate warning on the first connection is normal: Windows initially uses a self-signed certificate.
Step 6: Updates and hardening
- Updates: install all updates under Settings → Windows Update, then restart.
- Restrict Remote Desktop: in the Windows firewall the Remote Desktop rule can be limited to your own IP addresses. Even more secure is access through a VPN to your own server, for example with WireGuard.
- Own account: create a second administrator account with its own name. The „Administrator“ account is the most common target of automated login attempts.
- Backup: before larger changes, create a snapshot in the customer portal under „Backup & Wiederherstellung“ (backup and restore).
Step 7: Enter the license
The evaluation runs for 180 days. With your own license key it becomes a full version without reinstalling. In a command prompt as administrator:
DISM /online /Get-TargetEditions
DISM /online /Set-Edition:ServerStandard /ProductKey:XXXXX-XXXXX-XXXXX-XXXXX-XXXXX /AcceptEula
After the restart the full version is active. For a Datacenter license the edition is ServerDatacenter. slmgr /dlv shows the activation status.
Installing Windows manually
To go through setup yourself, insert the Windows image into drive 1 and the VirtIO drivers into drive 2 on the „Laufwerke“ (drives) card and restart the server. After the key press in the console the familiar Windows setup runs.
- When asked where to install, setup first finds no disk. Use „Load driver“ and open the folder
vioscsi\2k25\amd64on the driver drive, then the disk appears. - After installation Windows only has network access once
virtio-win-guest-tools.exefrom the driver drive is installed. Then the IP address comes automatically via DHCP. - The drive letter of the driver drive can change after a restart, for example from D: to E:.
- As long as the Windows image is inserted, every start shows „Press any key to boot from CD or DVD“. Without a key press Windows boots from the disk. After installation both drives can be emptied with „Auswerfen“ (eject).
If something does not work
- Console shows a UEFI shell or „No bootable device“: the key press came too late and the server booted from the still empty disk. Clicking „Neu starten“ (restart) in the customer portal brings the prompt back, and the installation then continues normally.
- Remote Desktop does not respond: check in the console whether Windows is still waiting for the password. Only after that is the server reachable.
- Windows no longer boots: the rescue system starts SystemRescue instead of Windows, with access to the disk.
Frequently asked questions
- Can I install a different Windows version?
- Yes, from your own ISO. It can be inserted via an HTTPS address or from your own PC via the console, the VirtIO drivers go into the second drive. Details are in Windows Server and ISO images on the vServer KVM.
- Does Glowfish sell Windows licenses?
- No. The license comes from the customer, for example from a Microsoft reseller or a volume agreement.
- How large is the disk under Windows?
- Windows uses the whole disk of the plan. After switching to a larger plan the partition can be extended in Disk Management.
See also: View vServer KVM Windows Server and ISO images on the vServer KVM Setting up a WireGuard server